
Screen Recording using MEDIALecture
Sometimes, you may want to screen record content, whether that be online lectures, tutorials to help students or anything in between. Screen recording can be a useful tool to help students a little bit better, and it can be done a number of ways, for example, through Microsoft Stream, Screencast-O-Matic and also MEDIALibrary.
This post is a guide on how to use this function through MEDIALibrary.
Screen Recording using MEDIALecture Guide
Step-By-Step
1. First you must access MEDIALibrary either though the services menu on Moodle or by going to hml.yorksj.ac.uk. When you are on the page, you must log in. The log in button is located at the top right of the page. 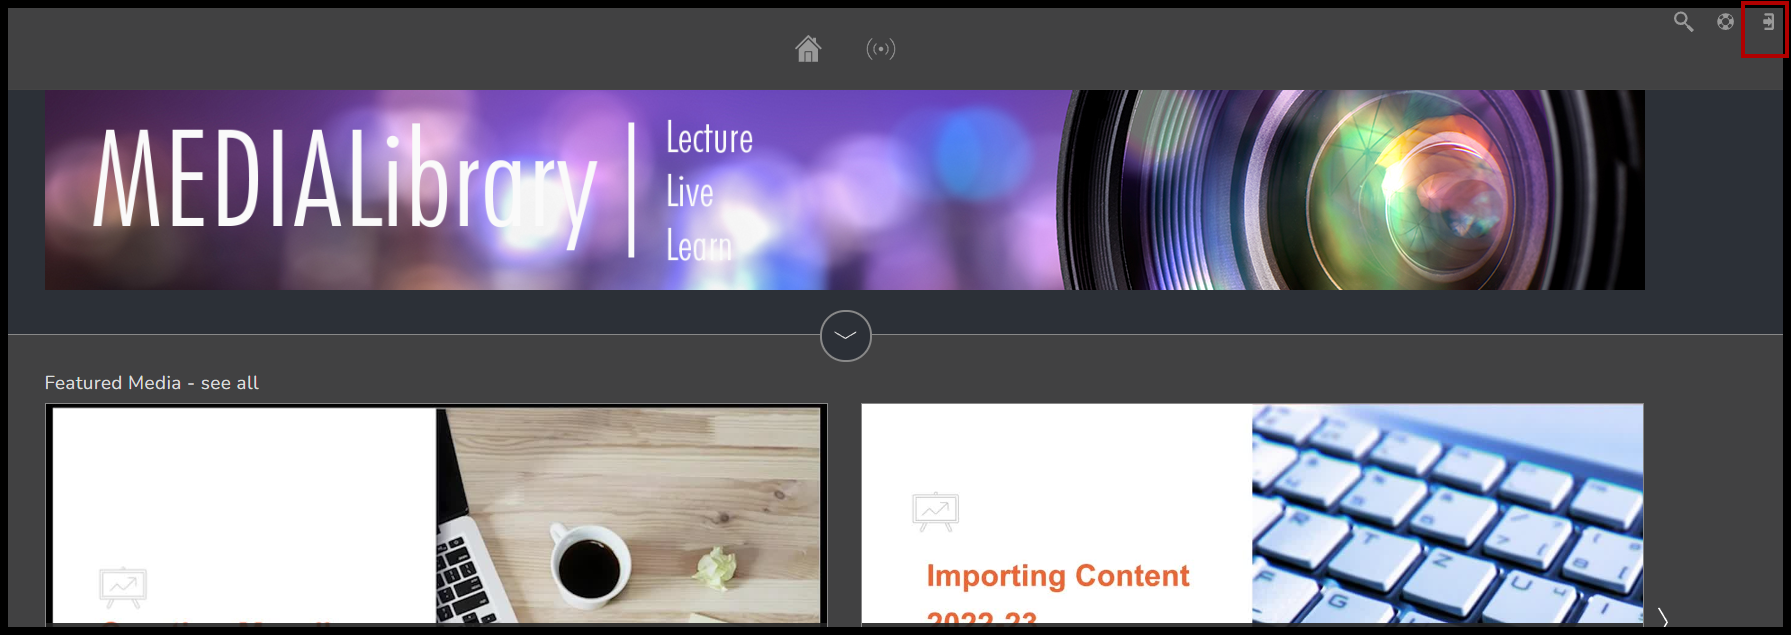
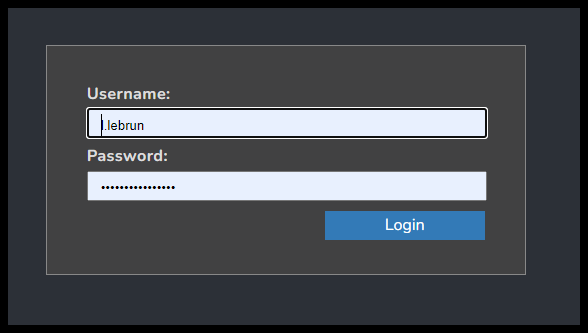
2. On the log in screen, you will be prompted to enter your university login. This will be the same log in you always use.
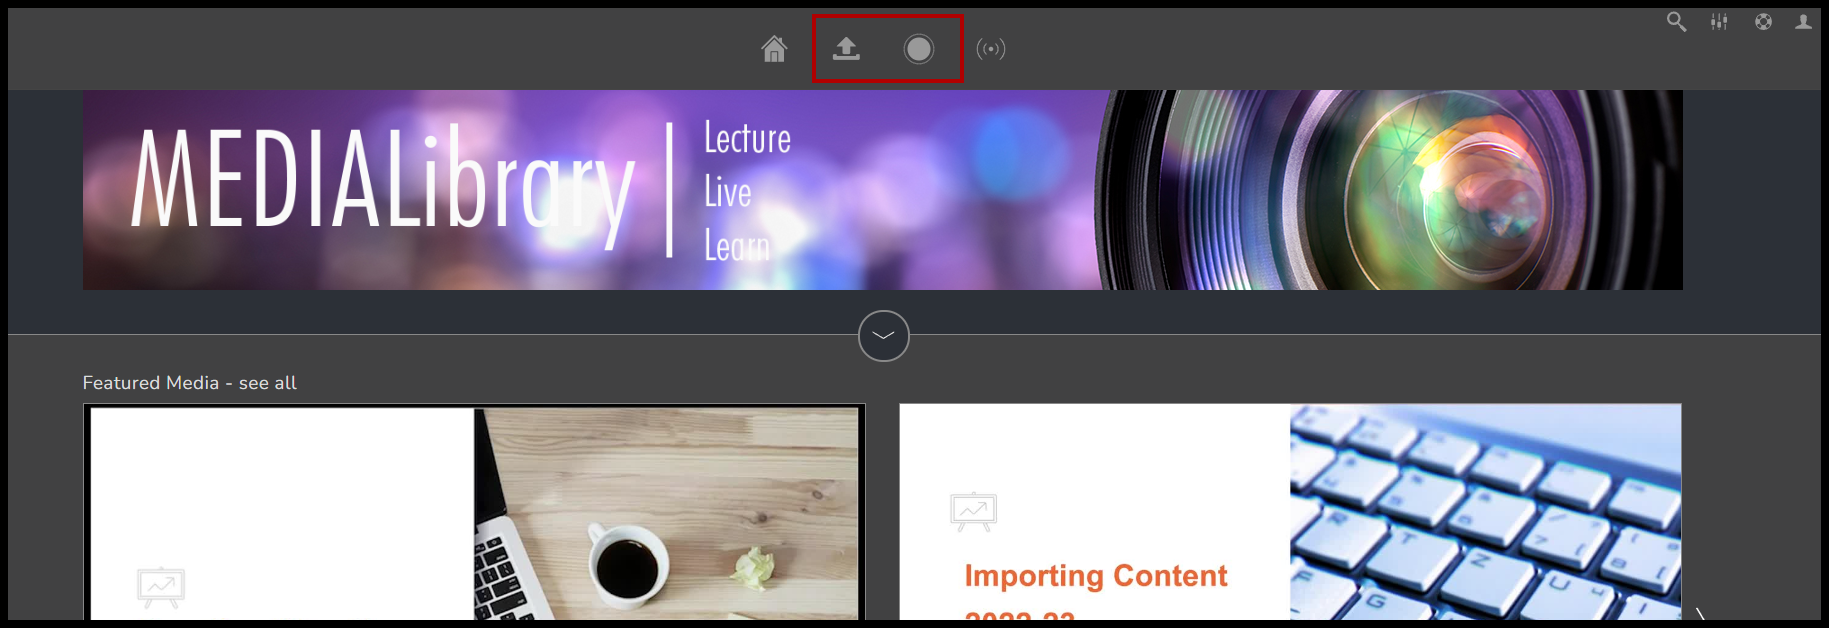
3. Once you have logged in, there will be two extra icons in the top middle of the screen. One is the record button, we will use this to begin our screen recording.
4. Once you click the record button, it may take a while to launch. If you have never used MEDIALecture before, you will be prompted to install it onto your device. This is to be expected, simply follow the instructions until it launches normally. I already have it downloaded on my device so it will launch after it loads.
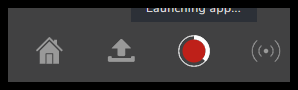
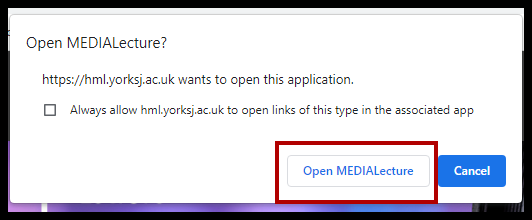
5. When it launched you will see a pop up asking if you want to launch an application, select to Open MEDIALecture.
6. When MEDIALecture opens, this screen will appear at the bottom of your screen, you could start recording now, but it is best to check the settings before doing so. We will return to this window before we record.
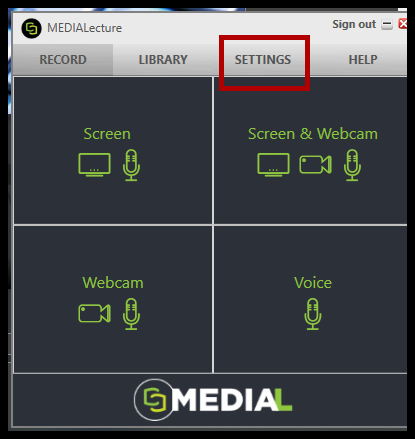
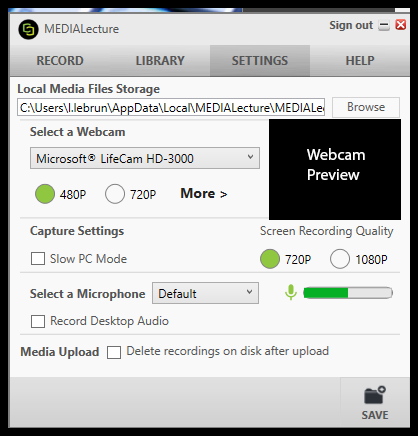
7. When you open the settings, make sure to check that the webcam and microphone you will be using for recording are selected and that they are working. You will also be able to choose here where the recorded video is saved to. When you are happy with your settings, select save and return to the ‘record’ menu.
8. Back on the record menu, you can select which devices you’d like to record with, screen, webcam, or microphone. When you are ready to record, select which of the 4 options you’d likem to record with.

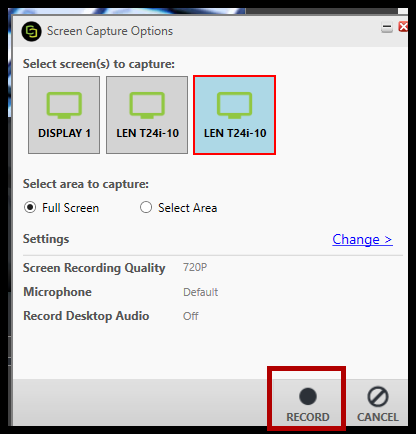
9. You will then see these options, if you have multiple screens, you must select which scree you’d like to record and if you’d like to record the full screen or just a select area of the screen. When you have decided this, you are ready to record.
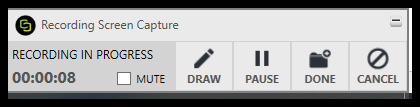
10. While recording, this menu will appear and this is how you can stop recording, or pause recording if you need to.
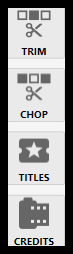
11. When you finish recording, your video will begin playing and you will also get the opportunity to edit the video a small amount using the ‘Trim’, ‘Chop’, ‘Titles’, and ‘Credits’ options on the left of the screen. When you are happy with the video, select ‘Done’.

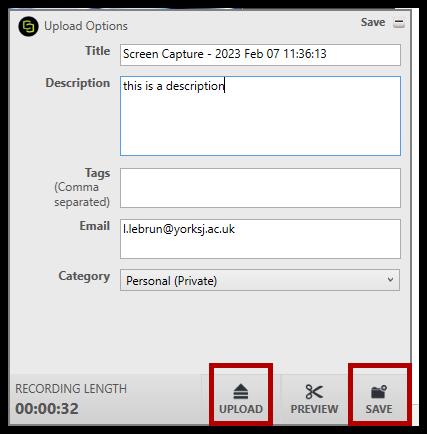
12. After selecting ‘Done’ you will be asked to enter some details about your video including a title and a description. When you add these, you can then ‘Upload’ or ‘Save’. Upload will upload the video directly onto MEDIALibrary. Save will save the video to your MEDIALibrary files, which you can upload at a later time.
If you have any further questions, please leave a comment or get in touch with the TEL Team.